Showing posts with label wallpaper. Show all posts

Wednesday, December 23, 2009

master bedroom; the big show

Sorry about the hiatus.

First. A few things about the show. We'd do it all over again. Seeing the house looking fantastic on TV was quite rewarding after all the work we've done. Also, watching ourselves was surprisingly not as painful as expected. We are good looking dudes.

I can't say I agree with the results (dead last). Although, trailing behind Leigh and Corey is fine with me - they're place is beautiful. While much of the show pointed out valid points, I would have liked more credit for actually building a kitchen in a space that did not have one. Conversely, we spent less than half the budget to which we were compared... that aspect wasn't discussed on the show and ultimately feels pretty damn good.

I can say we had a wonderful viewing party. The house was jam-packed with amazing people and much fun was had.

If you missed it, the folks at HGTV can't seem to get enough of us and it's been in rotation. Additional airings:
December 30, 2009 - 11:30 AM e/p
January 15, 2010 - 9:00 AM e/p
February 16, 2010 - 5:30 PM e/p

Now, about this master bedroom.

Before:
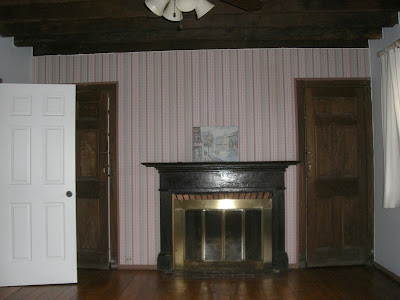


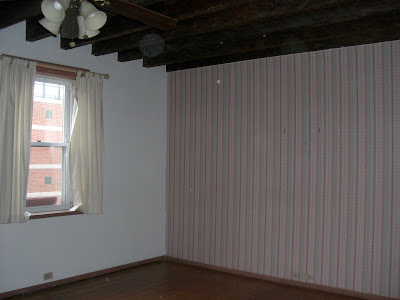
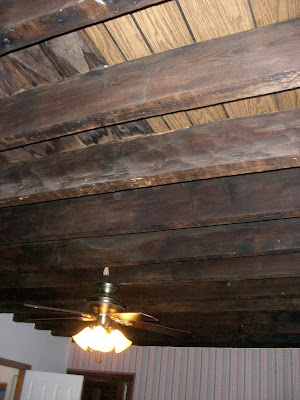
How about those beams? We tried to work with them. Ultimately, they darkened the room substantially and the lack of ceiling material allowed entirely too much noise transfer between the master bedroom and the one above on the third floor. You do not want to hear the noises coming from the master bedroom.

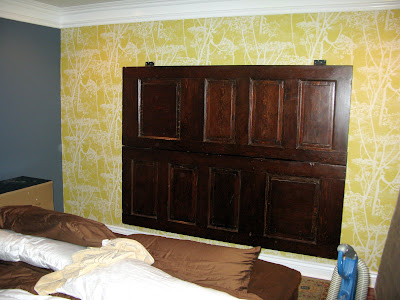
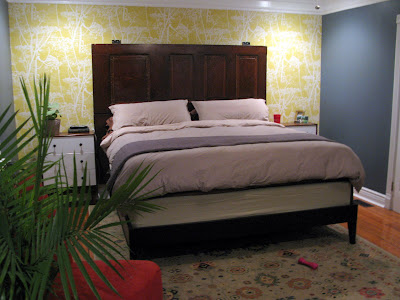
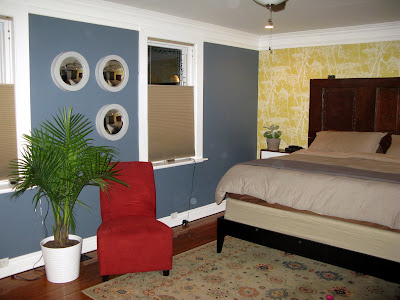
What's new? Covered the ceiling; added crown moulding; installed recessed lights and a new fan; refinished the floors; wallpapered a wall; FINALLY used those doors we spent so much time on a year ago; and have started putting it back together.

We love the king sized bed - which is resting on top of a frame from West Elm.

The side tables are an Ikea hack we saw on Apartment Therapy - $39 each (plus materials).

We think the wallpaper is stunning and give credit to Kay Ayres for helping find this. Kay is a close friend's designer Mom with a great eye. It's from Lee Jofa and installation was a breeze.



Merry Christmas from Baltimore!! Look at all this snow:


Of course - a dog picture. Here's Kanga looking sexy:

Thursday, July 24, 2008

decision making :: floors, backsplash, wallpaper

I'd prefer to be posting things like, "hey guys, check out the new counter tops" but for now we are still waiting for these darned contractors to get moving on the quote process to get rid of this wall. There are quite a few issues, let alone the fact that it's a load-bearing wall. There is plumbing, HVAC ductwork and electrical lines that will need to be reconfigured. Each contractor that has come through ends up having to schedule a second appointment with other people to give an accurate quote. So - it's taking longer than expected.

Fortunately, while we complain about not living on the first floor, we do have a fairly comfortable, efficiency'esque 'apartment' in the basement.

As the process goes on, decisions are constantly being made - and then changed - and then changed back - and then thrown out the window completely. Here are some considerations:

Wood floors - the ones in the house are pretty amazing. The planks are all slightly different widths, the color is warm and they are some seriously solid, thick floors. Original to the house, I imagine they could have been hand-scraped, according to this article, wood floors weren't mass produced in factories until the 1900's. Although, we were told by the previous owner that at some point in the '80s they were pulled up, cleaned and relaid - this is probably why they are in as good as shape as they are - not much squeaking or moving at all. Anyhow, they're in need of a refinishing. The options are:

--- a typical sanding/refinish to expose a new, very clean surface to then finish with polyurethane of some sort (we probably won't stain them, which will leave them a very light color) or;

--- buff them with a light sanding, leaving them the current color, but giving them a very shiny, hopefully nice look with multiple coats of poly. We like this option, because it will retain the rustic look that we really like - I love the dark line in between each board and would hate to lose that to a deep sanding;

--- any thoughts? like that window in the middle of the house? That's the wall that needs to be taken out - it used to be the rear of the home, hence the window.

Floors 013
Floors 003

Backsplash - this is so far down the line that I have time to change my mind at least 37 times. We are considering a few materials. One being stainless steel tiles. We saw this in a house and it looked great. I've read a few things about people having problems with it looking dirty and/or scratching - which makes me nervous. Especially when considering the fact that it'll probably cost twice as much as other materials. We went ahead and ordered some samples from Modwalls, just to see how they look. They look pretty great - the subway tile (second below) is my top choice (it's about .75"x1.5", to put it in perspective):


Wallpaper for the bedroom - Despite the fact that we sort of hate it after removing as much as we did (and still have more to do) - we love the stuff over at Ferm Living. This is only going to be on one wall in the bedroom, behind the headboard (which I'll post about later, we're making it out of the huge doors that were on the first floor - s'gonna be nice). We don't agree on this decision at all right now.

Craig is fighting for this:


But I like this one:


I'd actually pick this one right now - but it does not seem to be within Craig's compromise-able range:

Thursday, July 17, 2008

wallpaper removal

There are many ways to remove wallpaper. I initially tried a mixture of fabric softner and water on wallpaper that had been scored - I've heard of this working, but it didn't fair too well. It would have taken months to finish the job we have - and I imagine it would take ten bottles of fabric softner. So we rented a steamer for $34.

Photobucket
...still a slow process, but it helped immensely. It's easy to use and no chemicals. First, you fill the tank with hot water - it took about 30 minutes before the steam started, so the hotter you start with the sooner you'll be working. It's a relatively small tank, but it lasted a good amount of time. While you're waiting for steam, score the paper so that the steam can permeate the glue. Slowly run the steamer plate over the paper and it should start loosening from the wall.

The stuff in the bedroom was horrible and took much longer. It came off in two layers, first the decorative easter egg layer, then the backing paper.
Photobucket
The walls will need repair and primer before painting, but it's nice to take a step in the right direction.
Photobucket
The ivy paper was thicker and held together, so removing it was much easier. You can also see that we ended up exposing the brick all the way up the stairs. The darker diagnol line is where the roof over the basement stairs used to be.
Photobucket
Some tips:
-Keep a spray bottle nearby. If the walls are very wet, it comes down easier;
-Using the scraper is sometimes inevitable, but I tried to keep it's use to a minimum. If everything is wet, you can use your fingers to pull it down with less damage to the wall;
-Pull slowly and try to get as big a piece as possible.