Showing posts with label backsplash. Show all posts

Tuesday, March 17, 2009

backsplash - kitchen and wet bar

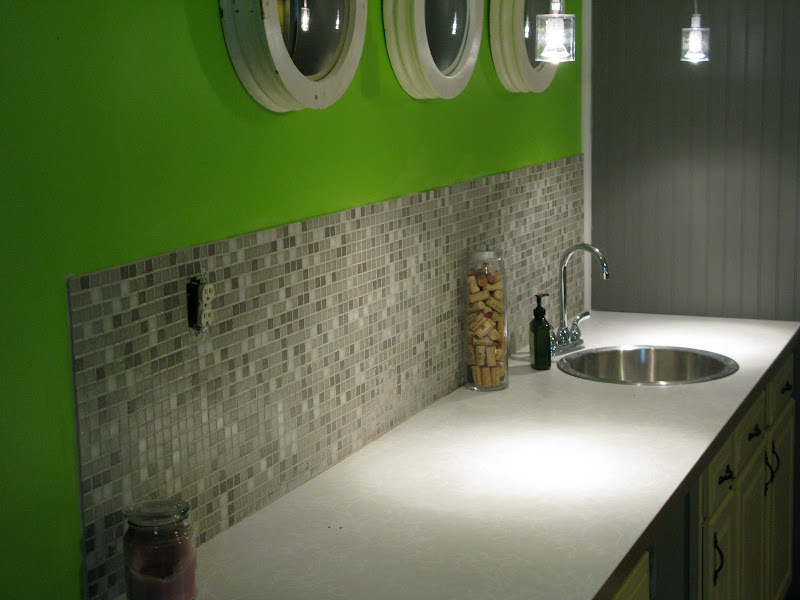
The backsplash is finally installed. It looks fantastic. If these walls could talk, I'm sure they'd say, "Mama just got some new bling and she's ready to tear up this town - outta my way."

This was an easy job, I didn't need need too many special tools and was finished over the course of a few days.

We want to give some big credit to Modwalls. In addition to being a completely friendly and helpful vendor, they have a beautiful selection of high quality tiles in a variety of colors. If you like the mosaic look and they don't have a color mix that works, you can mix up your own batch for a custom blend. As I mentioned before, we chose the Marrakesh blend for the kitchen - AND - we went ahead and got the Windy City mix for the wet bar in the basement.

There are some official installation guides here, but our process is described below.

1 - Adhering the tile to the walls - we did not use a concrete backerboard, but adhered the tile directly to the drywall. I used a V-Notched trowel with 3/8" grooves along with premixed, unsanded Mastic. When you are spreading the mastic on the wall, be sure that you're applying a thorough, yet thin and even coat. If it's too thick, when you press the tile flat against the wall it will seep up through the individual tiles. This went unnoticed in a few areas during my installation. It can be cleaned up after the mastic is dry, although this means more work. This picture from the wet bar shows some seeping mastic.


We were fortunate in that we did not have to cut any of the individual tiles to make them fit around outlets, etc. Because each tile is small, we merely cut sections out of the pattern and left the rest of the sheet intact - this worked well.

When you buy this tile, it comes in sheets that are about 12"x12". You may have sheets that have a netting on the back that sits right in the mastic - or they may have paper holding them together from the front of the tile. We had both types - see below:
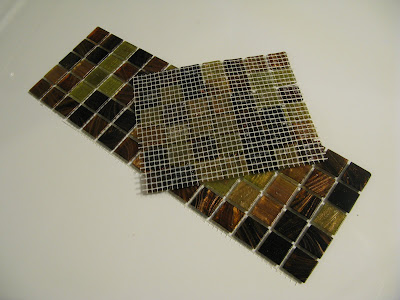

If you have paper fronted tile, you need to remove the paper after you fix it to the wall, but before everything is set firmly in place. I waited about 20-30 minutes and then started wetting the paper (sorry no picture). I found that a spray bottle worked best. When it's soaked through, the paper will easily peel away. At this point the tile fronts are exposed along with errors and crookedness. Because nothing is completely firm, you can straighten the lines. Now the mastic needs to firm up for at least 24 hours.

We had a few different edge types. I used blue painters tape which made for nice even grout lines.
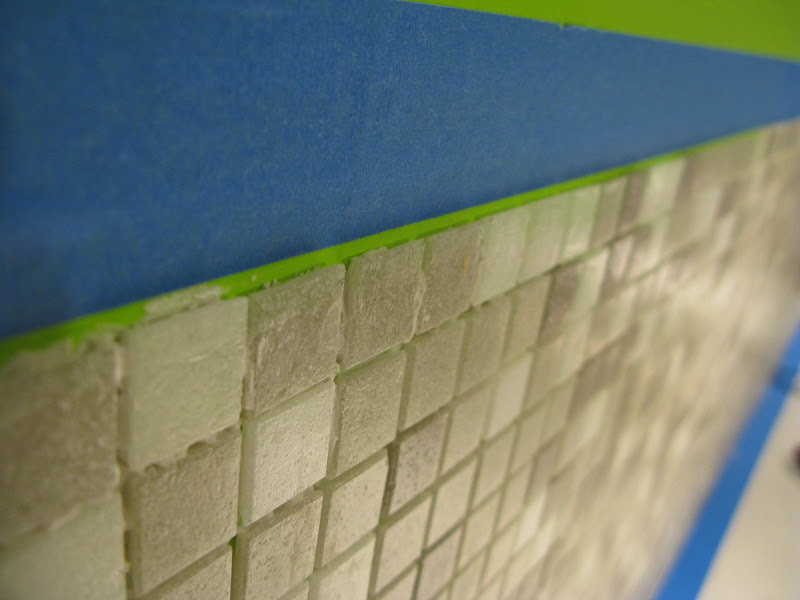
2 - Grouting - after everything is dry I suggest a good cleaning. The sooner you clean up, the easier the clean-up. Remember the seeping mastic? This needs to be completely fixed prior to grouting so the lines are all even and smooth.

With glass tile you'll want to get a non-sanded grout. There are many colors to choose from. I'm not a big fan of grout lines that pull attention from the tile itself, so we went with similar colors to the tile.

When the grout is mixed and ready to apply, I suggest having a few putty knives around and a good float. Slather the grout on the tile and start spreading it forcefully and evenly with the float in a diagonal direction to the tile.

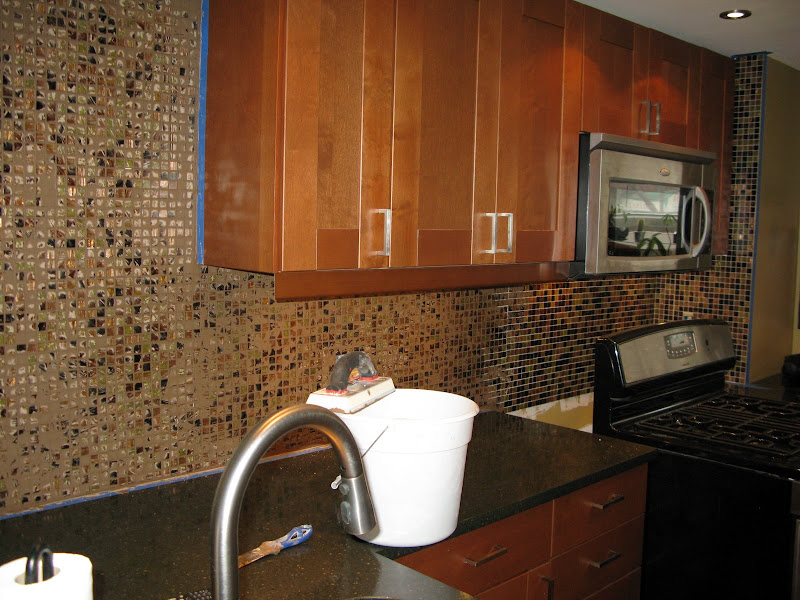
After everything was grouted, I waited about a half hour before wiping down with a damp [often-rinsed] sponge. As the remaining residue dries a haze will develop over the surface.

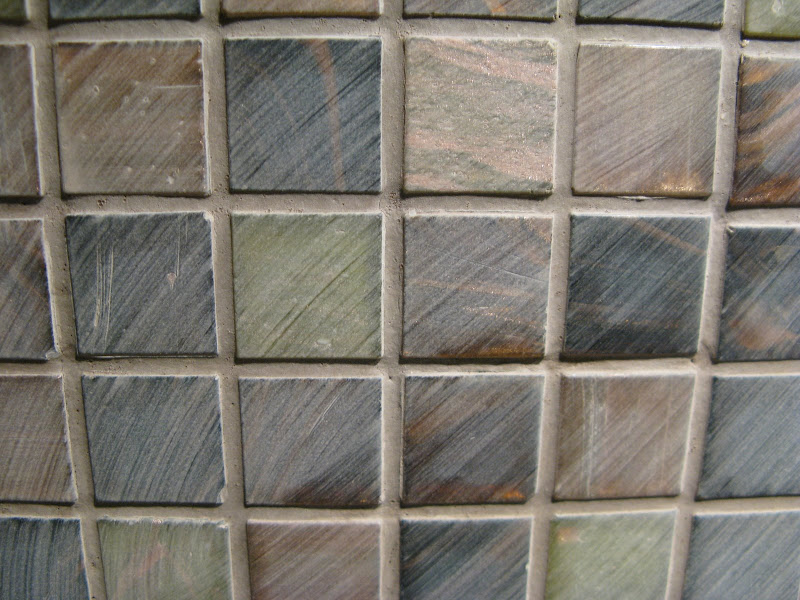
I had to come back a few times with the sponge a day later to polish everything up - but it came out beautifully!
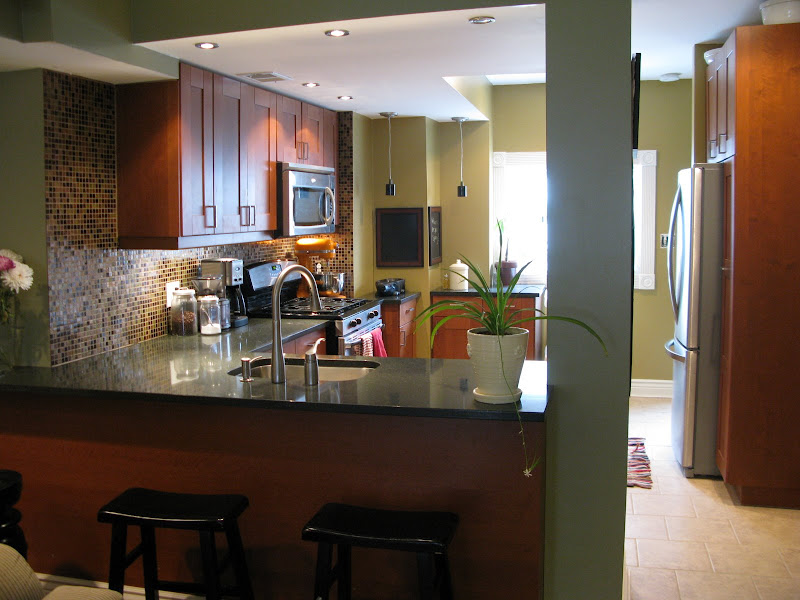
And the basement (ignore the unfinished electrical outlet):

Monday, January 5, 2009

television; ikea anga; backsplash

I’ll start off with a non-kitchen picture.  Finally. 

What’s new here? 

-We decided to paint the fireplace white.  We stripped the layers of old paint and varnish, picked, scraped, sanded, primed and painted.  The inside of the fireplace was also painted black. 

-We mounted the television.  The wire situation is yet to be addressed.  There are a few issues.  One, we need longer cables so that everything can comfortably run from the TV to the shelf with the components.  Also, cord management is yet to be resolved.  It’s looking like running everything through flat, paintable tracks is going to be our option.  We considered cutting a channel through the drywall and plaster deep enough to completely submerge the tracks, then re-refinishing the wall.  This just seems like a big job for a minor detail.  (Side Note: Wii Tennis is even more fun.  yeah - I'm pro.)

-The shelf is Ikea’s Anga series.  It fit the space, offered lots of storage and the glass shelves keep the brick in view.

-The base moulding is going in. 

Now something about the kitchen.  We decided on the Marrakesh tile blend from Modwalls – these pictures are from their site.  

Wednesday, October 8, 2008

kitchen planning

The initial excitement we had that the contractor's were finished has passed and it's time to get back to work. We took a little break and I've been under the weather. We have been tinkering around with a few small projects and repairs, but mostly we've been getting more serious about the kitchen plan.

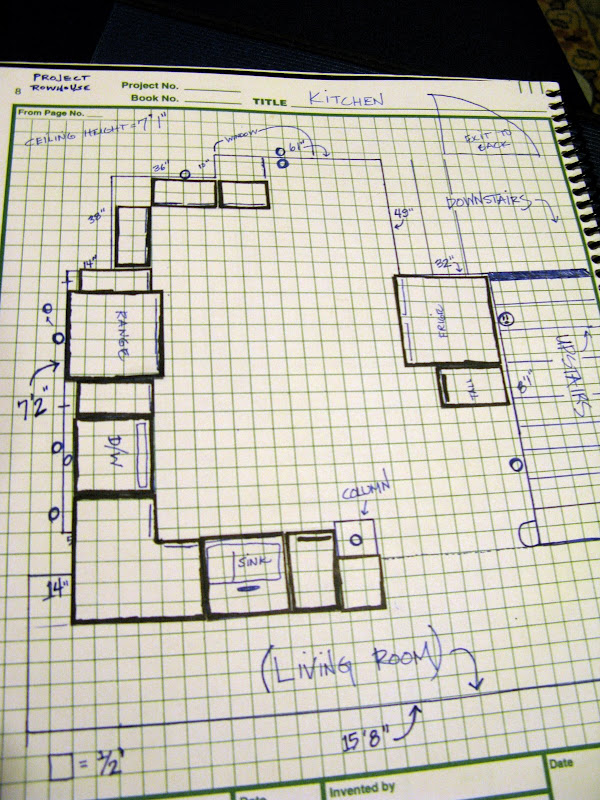
There are obviously many ways to think about how you want your kitchen to function and look. We like the fact that we were truly starting with a blank slate. I can imagine that if plumbing and electrical was already in kitchen-shape that we would constrain our plan to fit. We found that the easiest way to think about it was to draw a scale floor plan and cut out scale models of the cabinetry options. It was a bit tedious at first, but definitely an exercise worth doing.

We then taped out the layout on the floor to see how it feels walking through the room - it's looking good.

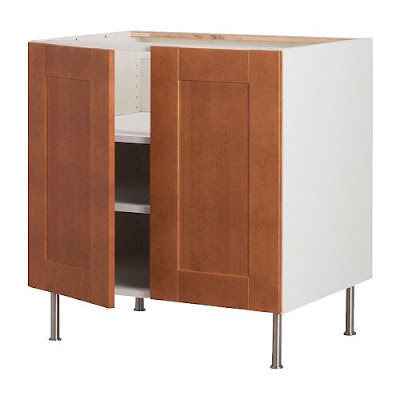
For cabinetry we decided on Ikea Akurum cabinets. There are many opinions on Ikea and their durability. If you do some research you'll find that an overwhelming majority feel that you can't beat them for the price. Of course, custom cabinetry - or other high-quality cabinetry - would be great, but saving money is important right now. We also had Ikea cabinets in our previous house and they were pretty great. Never had problems, cleaned up nicely and adjustable enough to fit everything we have. This color is Adel Medium Brown:

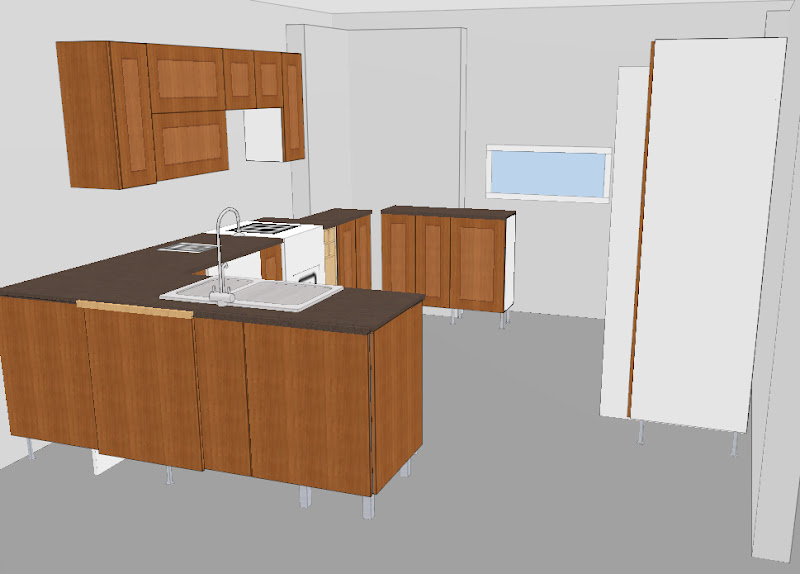
Ikea also has a nice kitchen planner tool that you can use to help decide layout decisions. While it's a nice tool, I found it easier to do the paper cutouts and then translating that into the program. It does create some nicer looking pictures of what we want:

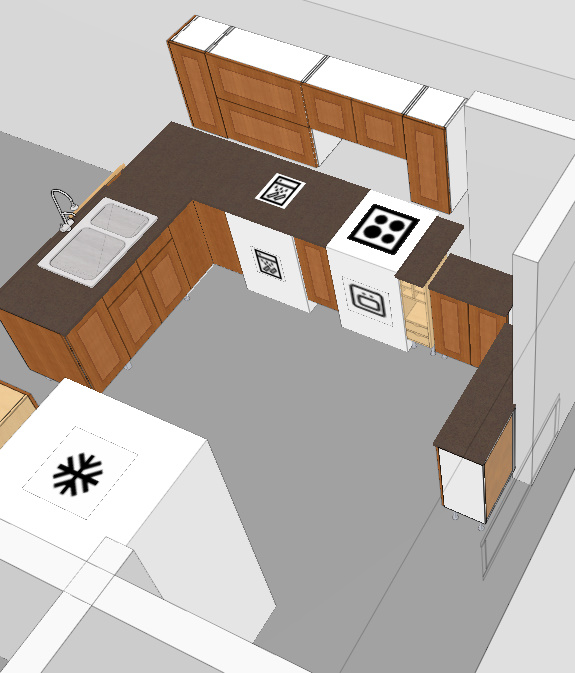
The column will be there at the end of the "L". View from above:

There is actually more counter space than Ikea's planner allows, but this give you an idea.
Speaking of countertops... we've decided on Silestone. This is made from quartz and apparently harder and more stain resistant than Granite and other choices. It's also really beautiful. We are going with a dark, almost black color. This is called Stellar Night:

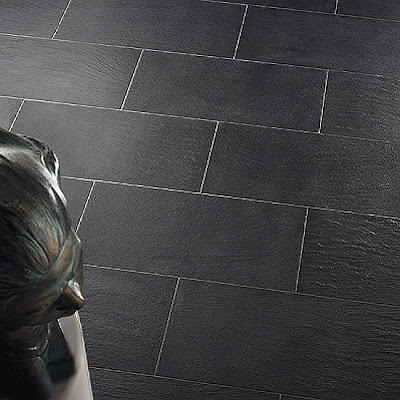
As for the flooring, we want to do something natural looking - and we're leaning toward slate options. We like something like this:

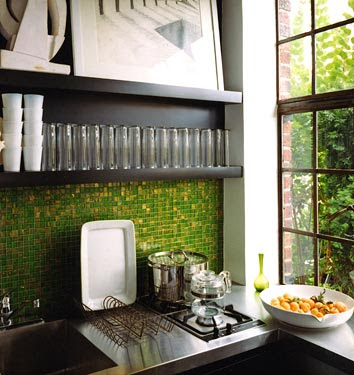
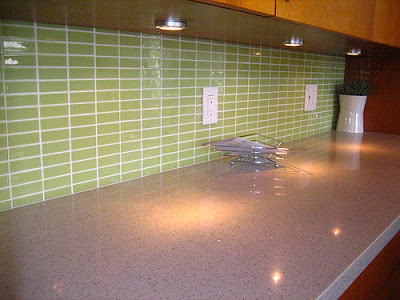
The backsplash has only been vaguely talked about, I like the idea of having a solid, slightly earthy green:

or;


In other news, we started getting a more serious supply list for the framing and drywall work we are about to start. Hopefully we can go this coming weekend and pick it all up - that'll keep us busy for a while. I did find out today that the exposed joists in the living room are remarkably level! We expected to have quite a bit of leveling and shim'work to even things out - but apparently the folks who built this house 200 year ago weren't messing around - thanks, dead guys.

I hope you were as meticulous in the master bedroom...

Thursday, July 24, 2008

decision making :: floors, backsplash, wallpaper

I'd prefer to be posting things like, "hey guys, check out the new counter tops" but for now we are still waiting for these darned contractors to get moving on the quote process to get rid of this wall. There are quite a few issues, let alone the fact that it's a load-bearing wall. There is plumbing, HVAC ductwork and electrical lines that will need to be reconfigured. Each contractor that has come through ends up having to schedule a second appointment with other people to give an accurate quote. So - it's taking longer than expected.

Fortunately, while we complain about not living on the first floor, we do have a fairly comfortable, efficiency'esque 'apartment' in the basement.

As the process goes on, decisions are constantly being made - and then changed - and then changed back - and then thrown out the window completely. Here are some considerations:

Wood floors - the ones in the house are pretty amazing. The planks are all slightly different widths, the color is warm and they are some seriously solid, thick floors. Original to the house, I imagine they could have been hand-scraped, according to this article, wood floors weren't mass produced in factories until the 1900's. Although, we were told by the previous owner that at some point in the '80s they were pulled up, cleaned and relaid - this is probably why they are in as good as shape as they are - not much squeaking or moving at all. Anyhow, they're in need of a refinishing. The options are:

--- a typical sanding/refinish to expose a new, very clean surface to then finish with polyurethane of some sort (we probably won't stain them, which will leave them a very light color) or;

--- buff them with a light sanding, leaving them the current color, but giving them a very shiny, hopefully nice look with multiple coats of poly. We like this option, because it will retain the rustic look that we really like - I love the dark line in between each board and would hate to lose that to a deep sanding;

--- any thoughts? like that window in the middle of the house? That's the wall that needs to be taken out - it used to be the rear of the home, hence the window.

Floors 013
Floors 003

Backsplash - this is so far down the line that I have time to change my mind at least 37 times. We are considering a few materials. One being stainless steel tiles. We saw this in a house and it looked great. I've read a few things about people having problems with it looking dirty and/or scratching - which makes me nervous. Especially when considering the fact that it'll probably cost twice as much as other materials. We went ahead and ordered some samples from Modwalls, just to see how they look. They look pretty great - the subway tile (second below) is my top choice (it's about .75"x1.5", to put it in perspective):


Wallpaper for the bedroom - Despite the fact that we sort of hate it after removing as much as we did (and still have more to do) - we love the stuff over at Ferm Living. This is only going to be on one wall in the bedroom, behind the headboard (which I'll post about later, we're making it out of the huge doors that were on the first floor - s'gonna be nice). We don't agree on this decision at all right now.

Craig is fighting for this:


But I like this one:


I'd actually pick this one right now - but it does not seem to be within Craig's compromise-able range: